Thursday, February 11, 2010

Crummy Coffee Cake


"Can I come in?"


Is this NOT the cutest most un-innocent puppy face you've ever seen?! Meet our Australian Shepherd, Pax. That was her when she was a pup.

Then she grew up...


She is a year old and spunky as all get out.
We recently acquired our other puppy, a purebred Husky, Ash.


Now you know. The Pax and Ash is named after my two wonderful puppies. I love these little monsters even if they do chew up everything!

Now! Onto the Crummy Coffee Cake!

I enjoy coffee cake! The light texture, the crumbly topping, and the dippability in warm drinks. YUM. (Yes. Dippability is a word. I say so!) I haven't made a coffee cake that I can remember and I was caked out. I've been making so many cakes lately I needed a small diversion and coffee cake seemed to do the trick. As I type this, I smell the nutmeg and cinnamon blending together in my warm kitchen! The yeasty bread dough smell breaks through every now and again, but the strong scent of cinnamon lingers. I only have another five minutes before it's done baking! Whoopeee!


Crummy Coffee Cake
adapted from epicurious.com

1 pkg yeast
1 C warm whole milk (105-115F)
1/2 C plus 1 tbsp sugar
1 tbsp fresh lemon juice (lime works great too!)
3 3/4 C plus 2 tbsp flour
1 1/2 tsp salt
2 large eggs at room temp. for 30 minutes
1 1/2 tsp vanilla
1 1/2 sticks (3/4C) butter cut into small chunks and kinda soft


Bear with me--- the instructions are a bit flappy.

Mix the yeast, 1/4 C of the milk, and the 1 tbsp of sugar together. I recommend whisking it real quick to incorporate the ingredients. Let bubble up.

Mix the other 3/4 C milk with the fresh lemon juice. It will curdle. GOOD. Let it. You'll use it all later.

Pour the yeast mixture into your mixer. Slowly add the flour (save the 2 tbsp), the rest of the sugar, the salt, and vanilla. Add in the eggs as well. I found that the dough was very dry at this point, so I slowly bounced between adding the flour and the milk at this point. Scrape the sides of the bowl and don't let the dough rise up on your beaters! Add in the butter bit by bit. This will help the dough to calm down and smooth out.

Once it's done mixing and seems incorporated, take the beaters out and sprinkle the 2 tbsp of flour over the top (aren't you glad you saved that 2 tbsp back like I told you?!) Let it rise...rise....RISE until doubled! It should take about an hour or two.

Once it has risen, gently pat it down to release some of the air.

Lightly grease your pan/pans. As you can see, I used three loaf pans. I figured it'd be better to make small loaves so I can give them away easier! Generosity wins again. Pour the batter in the pan, and gently pat it down to the bottom in an even layer. I switched my pans in the picture, but the pouring/patting goes from right to left...


mn... dough...

Here comes the fun part.


Sweet and Crummy Topping

1 1/2 C flour
3/4 C sugar
1 1/2 tsp cinnamon
1 1/2 sticks (3/4 C) butter, not hard, but not gooey soft. It needs to be hard enough to make big crumbs.
(you can add nutmeg/allspice/ginger if you like!)

Mix together in a food processor (or if you're poor-- I mean, FRUGAL like me and own only a hand mixer, use that.) Mix until big crumbs form. You want a good variety of sizes! Chill in the fridge until ready to use.

At this point in the game...use it! Crumble it over the top of your dough. Be generous!


(The recipe doesn't specify white or brown sugar. I used white sugar for the crumbles and later on used brown sugar to fill in the gaps. )


Never skimp on crummy goodness.


At this point, set the pan(s) in a warm place to rise...rise...RISE again! (an hour?)

After it has risen, preheat oven to 350F. Slap some brown sugar on top of the crumbles to fill in the gaps and add a bit of sugary pizazz.

Bake.

My three loaf pans took about 35-40 minutes. I draped foil over the top of all three towards the end of baking when I noticed the top was getting a bit crispy but the dough wasn't done (didn't spring back when touched). My glass pan on the right was a bit more shallow than the other pans *insert valley girl accent here* and it kinda spilled over. I put a pan in the oven when I noticed it might spill over. It did...glad I put it under the pan!


Holy cow! Enjoy! Your home will be filled with the intertwined scents of cinnamon and yeasty bread. How wonderful! How glorious!

Let cool a bit (or not, and burn your tongue!) and ENJOY.


I cut a sliver to give to my husband and asked for his opinion. He thought it was good. Light in texture and not too sweet. I'd totally make this recipe again, but I think I'd add some spices to the dough as well. I'd also make more crumb topping.

One can never have a crummy enough coffee cake.


Wednesday, February 10, 2010

White Cake that tastes like banana or cornbread?


In hot pursuit of a deadly delicious white cake.

Today is white cake day. Already tried a yellow cake. Moving on to greener pastures--- or whiter batter... Little did I know that the cake batter would come out tasting like banana bread. Seriously!

Let's be honest here--- only good bakers test the batter. We test the batter to make sure the cake is complete and doesn't need a hint more vanilla or a dash more of salt. After I initially mixed the batter, it was undersweet. I didn't mind. After baking a very rich chocolate cake with very sweet frosting I was ready for a mild cake. I added a bit of vanilla syrup and a dash more sugar. After whipping for a while, I covered it and let it rest for half an hour.

Upon my return I tested the batter one more time before I baked. Holy cow. This batter tasted like banana bread. It was the weirdest thing. I didn't mind-- I like banana bread! I was perplexed, however, how my white cake batter came out tasting like banana bread. It was neither here nor there, for it was time to bake that sucker!

White Cake


2 C white sugar
1 C butter
4 eggs (2 whole eggs, 2 whites only)
3 C flour
3 1/2 tsp baking powder
1 C milk


I first grease with shortening and flour my three cake pans. Here's a handy trick that my LOVELY MOTHER taught me! -- Instead of scooping shortening out with a spoon or spatula, use a baggie. Dig in with your fingers to get the right amount and you can more readily smooth the shortening down onto the pan. No mess! Just turn the baggie inside out when you're done. Throw away. Voila!


In a big mixer, cream the butter for at least ten minutes.
Add sugar a little bit at a time, remembering to scrape down the sides. Let this cream again for another 8 minutes. *Yes, this is important. Don't skip it.*
Add in the eggs one at a time.
Let mix while you sift the flour and powder together.
Pour the flour in at 1/4 cup intervals. Don't just dump it all in there. If you do, not only will you get a big cloud of flour dust, but you will also miss out on the chance to fully incorporate all the flour into the batter properly.
It will get to the point where the batter will be looking a bit thirsty. At this point, start adding in a bit of milk at a time just to return the batter to liquid, and then add more flour. Alternate adding milk and flour until they are all gone.


Pour batter evenly between the three pans. As you can see, I overfilled my two and left none for the third pan. Sad third pan.


Place in oven and bake at 350.
*my two pans took about 20 minutes, but three pans will take less!*


Enjoy!

I'll be completely honest in my appraisal of this cake. I tried a piece while it was still hot and it tasted a bit cornbready to me. I know. From banana batter to cornbread cake. It's a bit dense in texture but tastes great! I was hoping for a lighter cake. The original recipe I varied mine from called for four whole eggs (people complained it to be too eggy tasting) and 1 Cup of butter (I used half butter, half shortening). It just...has a bit of a cornbread tasting flair. I honestly don't know what would cause this. I'll be sure to let you know how it tastes once I frost it.


My wonderful husband just came through the door and I asked him to taste test my cake.
I cut a piece as long and wide as a deck of cards.
He had a bite...thought for ten seconds.
"Is it good?" I asked.
"Better try another bite..." said he.
I gave him another piece.
"What do you think? I asked again.
He thought for another ten seconds.
"I need another bite to make sure..." he said with a smile.
I figured this could go on until my cake was gone...so I gave him another piece and screamed
"It TASTES like CORNBREAD!"
He shook his head and calmly said "It tastes more like a sugar cookie!"

So. There you have it. Unbiased, intellectual, and ed-jew-muh-kay-tid opinions on this new white cake recipe. I really think it will be great after I frost it! I can see this cake being a good base for a banana filling or even apples.


Monday, February 8, 2010

Buttery Buttercream and Yellow Cake Goodness


I have NO recipe for white cake or yellow cake. In fact, I have no red velvet recipe or german chocolate cake recipe. I have only carrot cake or chocolate cake recipes. I was overdue for a new cake trial run.

I was on a search for a great moist yellow or white cake recipe. Thanks to bakerella.com (a great baking blog!) I found a yellow cake recipe I was willing to try.


Yellow Cake

1 cup (2 sticks) of butter (room temperature)
2 cups of sugar
4 eggs (room temperature)
3 cups of sifted self-rising flour
1 cup of whole milk (room temperature)
1 teaspoon pure vanilla extract


Beat butter until fluffy.
Slowly add in sugar. Beat for about 7 minutes.
Add in eggs one at a time
Add flour and milk alternatively, beginning and ending with flour
Mix in extract until just mixed.
Pour batter evenly into three greased/floured baking pans.
Bake for between 20-30 minutes, depending on oven.
After five minutes of cooling, remove from pan. If you greased your pan properly, it will come out with no sticking.

I let the cakes cool and freeze for a day. When I was bold enough to try a buttercream recipe for the first time, I decided to snag them from the icy clutches of my freezer and warm them up with a bit of strawberry sauce and buttery buttercream.

Extremely Buttery Buttercream

1/2C egg whites
1 C sugar
dash of salt
2 sticks + 6tbsp butter (cold but not hard)
1 tsp vanilla

On a double boiler, whisk egg whites and salt.
Keep whisking eggs while slowly adding sugar at fourth cup intervals until incorporated.
Keep eggs on double boil until the eggs no longer feel grainy when touched.

Transfer egg mixture to a mixer.
Mix eggs until the bowl is no longer hot (long time!) Scrape down sides of the bowl!
Slowly add in butter bits at a time until all is incorporated.
Whip until it is wonderful creamy frosting. Mine took about 10 minutes.


*note-- For my double boiler, I use a saucepan halfway full of water that has been boiling for a minute or two. I then add a smaller saucepan on top/inside of the saucepan that will sit on the edge of the bigger saucepan as to not touch the water or fall in. That, is a double boiler!

Strawberry Filling

pkg strawberries de-stemmed and cut
half-1 C sugar

Bring both ingredients to a boil and let it thicken. If you let it cook long enough, it will thicken.


"Layer Cake--- ASSEMBLE!!!!!"


One of my three layer cakes broke in half due to my lack of pan greasing skills, so this cake is only a two layer cake.

One layer went on my cardboard round, then I slathered the strawberry sauce *cooled* on top, leaving a little gap around the edge so the strawberries would not seep out into the white buttery buttercream frosting.

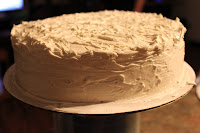
I put the second layer on top of the strawberries and dumped my buttercream on top! I smoothed it down and decided to fluff the top with a knife.


The cake overall was good! My husband said it was light and didn't feel full after one slice. That's fantastic news! He also critiqued my buttery buttercream as being too--- you guessed it--- buttery tasting. I would agree with him. I added some banana flavor to it to offset some of the butter and it still cut through like a bad splinter. Lesson learned! If you love butter, use no other recipe than this one!

Due to the snow I could not go out and get more powdered sugar or marshmallows for my fondant. I'll do it when the snow melts and after I find yet another great recipe, hopefully this time for a white cake. Dare I venture into the realm of pies next?


Saturday, February 6, 2010

Super Mario Brothers Finished Cake


Here is my Mario cake! It's not perfect, I know. I was just so stoked to be able to make figures that halfway resemble the actual characters. I'm most proud of Yoshi... but I know the others need work. Someday I'll re-do this cake and make it glorious in it's nerdtastic form.


Friday, February 5, 2010

Super Mario Brothers Cake and Fondant

Good things come in pairs, I think.

It was like any other day, nothing to make today special. It was breezy and sun-shine-y. Little did I know the disaster that awaited me.

I baked my chocolate cake as usual. I had all the ingredients and even added a vanilla bean.
350 degrees and fifteen minutes later, I smelled burning chocolate.

I ran to the oven and sure enough, my cake was singed on the edges. It was crusty and it was nothing but crumb. It broke when it came out of the pan. I was upset. Thoroughly.

I decided that I would not let this small failure set me back from making a fantastic Super Mario Brothers Cake. I baked another chocolate cake, different recipe.

This recipe turned out much better. It didn't burn and it was just perfect.

I froze my three layers of chocolate cake and made a batch of my mom's wedding frosting *very rich!* I slapped a dab of that good ol' frosting on a cardboard circle and started layering my cakes, putting frosting in between each. I ended up making two batches of frosting to get the job done. After I smoothed it out, I let it freeze to harden.

I made a batch of fondant from corn syrup, shortening, and powdered sugar. I followed the recipe as written and came out with a hard clump of sugar. I tried to roll it out so I could cover my cake but it kept breaking and flaking off. Not again, I thought. Do I really have to make a second batch of fondant as well as chocolate cake? Of course I do.

This time I used a marshmallow fondant recipe. It took half the time and was far easier. I got amazing results.

Marshmallow Fondant

1 bag mini marshmallows
2 tbsp water
1 bag (2lbs) powdered sugar

Melt marshmallows and water in microwave. Heat for 1 minute, let rest after stirring, and then heat for another minute. Stir in powdered sugar. All of it. I would highly recommend greasing your spoon with crisco/shortening as well as heavily greasing your tabletop. No joke.

Pour/dump marshmallow-sugar mixture onto greased surface and knead until smooth and soft. You shouldn't need more sugar than 1 bag allows.

Let sit in the fridge until ready to use.


Once ready to use, set to room temperature. If the fondant is too hard, heat it in the microwave for 10 seconds at a time until it is soft enough to knead and use. *should take about 20 seconds if its cold cold, if room temp, only about 10.*

If you want to add color, add it now. Knead in a bit of color. It will take a lot of kneading to get it uniform in color. If you do not knead it fully to incorporate all the color, you will have a tie dye swirl effect in the fondant--which is fine if that is what you are going for.


If you want white fondant, do not add food coloring. Grease countertop with shortening/crisco
and sprinkle just a bit of powdered sugar on the counter over the grease. Put the fondant on the table and roll it out thin, to about 1/4 in or a bit more in depth. If you get it too thin, you will see every bump in the cake below. If you get it too thick, I'd imagine it would be harder to work with. Your call!

How big you roll the fondant depends on how big your cake is. If you have a cake that is 10 inches across and 3 inches high, you'll need to make a circle with a diameter of at LEAST 16 inches across. (10 across, 3 on one side, 3 on opposite side) Remember, it's better to have too much and have to cut it off.


You are ready to put it over the cake! I found it easy to roll the fondant lightly onto the rolling
pin, set the cake on the table and unroll the fondant on top of it. I worked towards me. In other words, I put the cake down and the rolling pin was at arms length away from me. I lifted the fondant so that the edge of the fondant was a bit below the bottom of the cake. Unroll it on top of the cake. Remember-- your cake should be frosted and hard.


Once you unroll it, start at the top, moving your hand in circular motions pressing lightly down to adhere it to the cake. Move fast as to not make indents in the cake! As you are doing this, start gently pressing on the sides of the cake to set that. As you can see, there will be ruffles! To get rid of these, start at the top, rub the fondant down onto the cake and gently tug on the fondant at the bottom to stretch it out.


I found that once I reached the bottom of the cake and the sides were smoothed down, I took the cake and put it on top of a cd stack so that it would be higher up and I could cut the excess fondant off easier.


After you cut off the excess, smooth it down with your hand gently. If you have a fondant smoother, GREAT! I didn't and I didn't want to pay the money... I know-- I'm cheap. It still gives a great finish.


I started coloring small bits of leftover fondant and shaping them with a knife. To attach the pieces to the cake, I mixed about half a cup of hot water with 1/4 cup sugar. I brushed the back of the piece I was attaching with this sugar mixture and pressed it on lightly. Beware that you don't leave fingerprints or indents!

Excuse the crude cutting and shapes--this was my first time with fondant and the next time will be better!!


I'll finish the Mario cake today and post more pictures! I'm almost done shaping a Yoshi and have Mario yet to form!

Working with fondant isn't as bad as I thought it'd be. This marshmallow recipe tastes good compared to the first batch I made. I hope you try out fondant! If you don't want to roll individual shapes, use a cookie cutter to shape them!


Creamy Chicken Calzones


When you're broke and hungry, bread seems to fill a person up quite well.When you have bread, cream, and chicken, creamy chicken calzones fill up a person even better.

I wanted pizza, I tell you! Alas, no cheese or pepperoni in the house. Although I did have soup, I didn't want to eat it. I wanted something bread-y and delicious.

Creamy Chicken Calzones
6 chicken tenderloins
2 cups cream
a few tablespoons of flour
all the spices your heart desires (garlic, onion, chives, parsley, pepper)
Any veggies you want (onion, mushroom, spinach, artichokes, peppers)
pizza dough (recipe to follow)


Mix the flour into the cream. Cook cream in a large saucepan with all the spices. Cook on medium heat (you don't want to burn the cream!) until it is very thick. This will take quite a while...10-20 minutes. If you are brave, turn up the heat but stir often! If it gets TOO thick, thin it with a bit of milk.

Boil the chicken tenderloins until they are white all the way through (perhaps about 10 minutes. Cut one open to check it.) Cut up chicken into small chunks and add to the cream and continue to cook. Once very thick, remove from heat.


Roll out pizza dough to a 1/4 - 1/2 inch thickness. Place a spoonful of creamy chicken mixture onto the pizza dough. Cut a square around the creamy chicken mixture big enough so you can fold over the dough to the other side and make a pocket. Pinch the edges of the dough together tightly and roll up to resemble a pizza crust if you wish.

Then, I sprinkled more spices over the top of the dough. For a little extra flavor, I added a small spoonful of pizza sauce on the top, just to give it zip.

Bake for about 15-25 minutes, depending on how crusty you like your dough.

Cut and enjoy!

Be sure to taste test the cream sauce. The one thing I regretted is not being able to add cheese (didn't have any at the time) and that it wasn't heavy enough on spices. Go crazy! Add onions, peppers, mushrooms, spinach! Give it more zip!

Quick Pizza Dough:

3/4 c warm water (105-115F)
4tsp sugar
1tbsp olive oil
1/2 tsp salt
1 tsp garlic
1 tsp active dry yeast (1 pkt)
2 - 2 1/4 c flour


Sprinkle yeast and sugar over warm water. Let bubble up (takes about 5 minutes)

Once bubbly, add yeast to the flour, salt, and garlic in a large mixing bowl. Use a mixer initially to mix it together. Once it starts to get thick, take out and knead by hand (fold it over itself many times, pushing out the air and making it smooth and elastic).
It should not be overly sticky or dry. If it is really sticky, add a tad more flour. If it is really dry, add a bit more water. Be warned---going overboard with adding ingredients will alter the texture/end result! You should be fine.

Once dough is smooth and soft, place in a bowl that has been smothered with the olive oil (easier to get out once it's risen). Cover and place in a warm draft free place until doubled in volume.

Once doubled, it is ready to use. Roll out to desired depth.

(for pizza-- add toppings and sauce, bake about 10-20 minutes depending on how you like your crust. more time for crusty crust, less time for soft crust.)


ENJOY!

I'm not one to like intricate recipes. I look for simple ingredients with many spices. Hope you enjoy.


On another note, I made a chocolate cake today and homemade fondant. I'm excited to see how it all comes together into a chocolate layer cake. *Mario Brothers Themed Decoration?!*

Have a grand day!


Friday, January 29, 2010

Chocolate Chip Cookie Dough Syrup


Is it redundant to add a few tablespoons of Torani Chocolate Chip Cookie Dough syrup to a batch of homemade Chocolate Chip Cookie Dough?
My in laws are traveling to visit us this weekend. I wanted to make something quick and easy, yet very tasty and yummy. Chocolate
Chip Cookies was my choice. A White layer cake was my second choice. For fillings between the layers, I'd flavor my light frosting with strawberry, orange, and blueberry. I don't look forward to the bleeding of the colors into the white cake....but hey. That's a small sacrifice.

I have yet to find a better recipe for chocolate chip cookies. These things rock. I made a double batch today, hoping to freeze some of the dough for a rainy (or snowy) day.


Delicious Chocolate Chip Cookies

1cup butter (room temperature)
1cup packed light brown sugar
3tbsp milk
2 eggs
2cups flour
1/2 tsp salt, baking powder, baking
soda (each)
3cups chocolate chips (I always use semi-sweet. Milk Chocolate seems to make for a really gooey cookie, almost runny. Semi-sweet holds together better for me)

Mix butter and sugar until well incorporated. Slowly add in eggs and milk.

Always scrape the sides of your bowl while mixing. This will prevent clumps and parts that are not mixed resulting in a more consistent batter for cookies.

At this point, I usually mix in the salt, powder and soda. You can sift those three ingredients with the flour, if you wish, and add it all together. I don't.

Finally, mix in the flour SLOWLY. (If you don't pour it slowly, the flour will poof up in the air...)
Beat until all ingredients are mixed well. Don't forget to scrape the sides and bottom of the bowl!

Stop the mixer and stir in the chocolate chips by hand. Once well incorporated, set the bowl inthe fridge to cool at least a few hours (I put mine in the freezer to speed up the process!) I promise, the cookies come out WAY better if you do this step. If you go from mixing to baking immediately, the cookies will be finicky.

Bake cookies for about 8-12 minutes on a preheated stone/baking sheet.

Tips:

Sifting the salt, powder and soda with the flour gives a smoother dough. I can't tell enough of a difference to do it every time. That, and I don't own
a sifter. *GASP!*

Never use metal baking sheets unless you want a crispy flat cookie. If that is what you desire, GO FOR IT! I prefer using baking stones. I have never had an issue with my cookies, or any other baked item for that matter.

Scrape the sides of the bowl. I can't stress this enough.

Use fresh ingredients.


This go around, I decided to use Hungarian High Altitude Flour in my cookie dough. I heard it's a great flour and I needed more flour in my cupboard, so I bought some!


Whilst on the final leg of mixing my dough, I peered over at my collection of Torani syrups and saw a chocolate chip cookie dough flavored syrup. Dare I add cookie dough flavor into my cookie dough? I quickly turned away at the thought of such treachery and told the dough mixing and whirring beneath the stand that I would never betray it.

Adding flavoring to an item that the flavoring is made to taste like is quite redundant to me. It might boost the flavor a bit. I didn't want to find out with my cookie dough. Perhaps next time. Although, while I was browsing pizza dough recipes I came across a dough recipe that called for--- you guessed it---pizza dough flavoring. I just about died. Seriously?! Isn't that almost like selling ice to an eskimo or a toothbrush to a dentist? GAH!


For a catering job, I had to make two cheesecakes a couple of days ago. A Vanilla bean and a Chocolate chocolate chip. Mn.... Yum. I didn't take a picture of my Vanilla bean one...it's just a plain ol' cheesecake!